Configure a Domain Controller and DNS in a Home Lab
BUILDING A HOME LAB OR SMALL OFFICE SOLUTION


Setting up a domain controller, DNS, and DHCP in a home lab environment offers significant benefits for learning and managing a network. By creating a domain controller, one gains hands-on experience with user authentication and authorization, which are crucial for network security. Implementing DNS allows for the exploration of name resolution processes, helping to understand how devices communicate in a networked environment. Meanwhile, configuring DHCP streamlines the management of IP addresses, making it easier to allocate addresses dynamically to devices on the network.
Having control over a home lab encourages experimentation with various configurations and scenarios, fostering a deeper understanding of network administration, which is invaluable for anyone pursuing a career in IT or looking to manage their own home network effectively. I'm ready when you are.
Prerequisites:
Installed Hypervisor (Hyper-V, ESXi, Proxmox, etc) if you don't have this installed yet, see Choose Your Hypervisor blog.
Installed Windows Server 2019 on a VM that meets the minimum requirements, you don't need to have a Windows license key or activate Windows Server to run domain services in a home lab, but for administering an Enterprise environment having a valid Windows license is required. At the end of this blog you will see how to extend your activation trial lifespan so you will never have to purchase a license key, this is only recommended for testing purposes such as home lab environments.
Have the local administrator password
Have networking in place
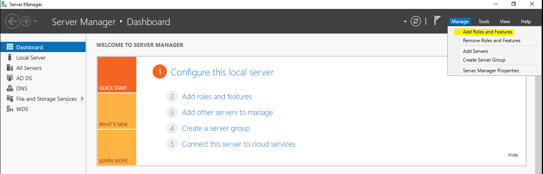
Launch 'Server Manager' and click 'Manage' at the top right, select 'Add Roles and Features'
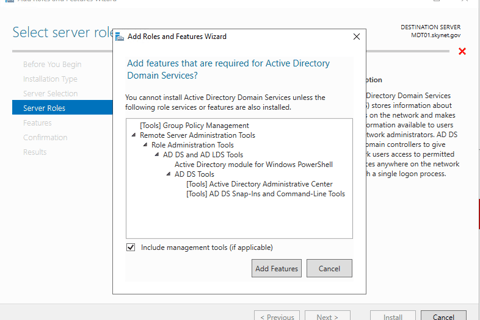
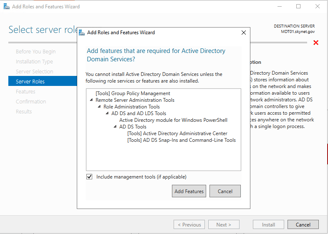
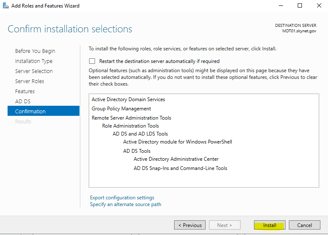
Click 'Next', select 'Role-based or feature installation', click 'Next' then 'Next' again, select the 'Active Directory Domain Services' checkbox, a window pops up click 'Add features'
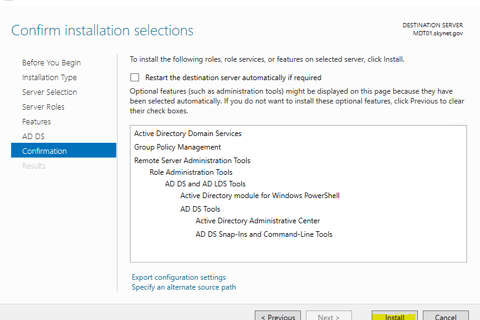
Click 'Next', then 'Next' again, then 'Next' again, leave the checkbox unchecked for the restart and click 'Install' to begin installing to Active Directory Domain Services Role on your Windows Server.
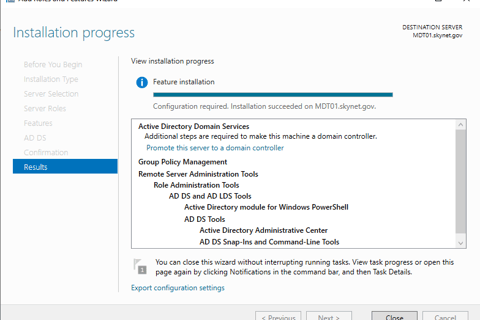
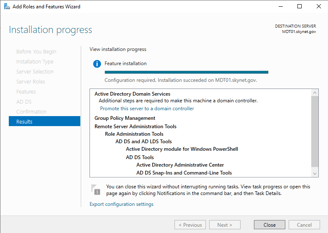
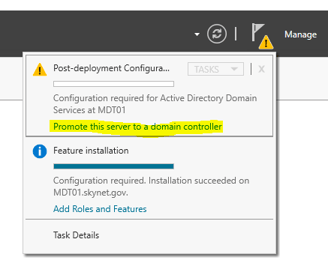
The Active Directory Domain Services role has been successfully installed, but that doesn't mean your server is a domain controller yet. The role itself allows administrative functions to run on the server such as Active Directory Users and Computers but we still need to tell the server that it is going to be responsible for the authentication and authorization of the domain by promoting the server to a domain controller.
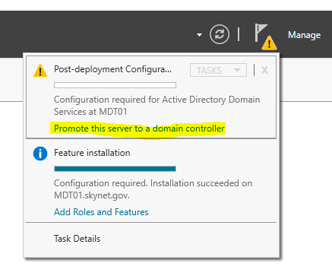
In 'Server manager' click the yellow warning at the top right, select 'Promote this server to a domain controller'.
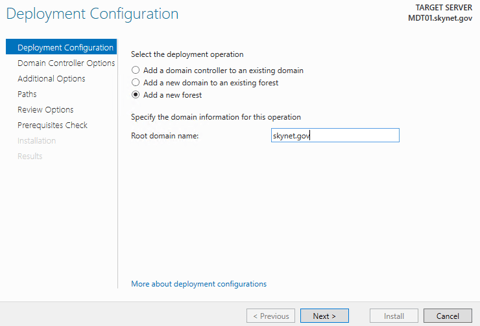
Since we haven't established Active Directory in our lab, we will want to select 'add a new forest', a forest is the top-most layer in Active Directory and can contain multiple domains with different users, group, and policies. This forest is called the 'root domain'. Type the name of your lab domain, for my home lab I am using 'skynet.gov'. Click 'Next'.
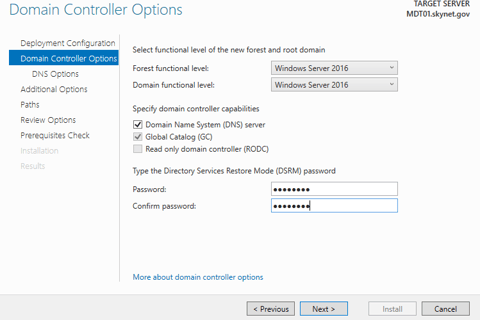
Ensure the forest functional level is Windows Server 2016 (the forest is typically compatible with one version prior to your install version of Windows, so for WS2019 the functional level is WS2016) type your password then click 'Next'.
Click 'Next' at the DNS options, we will configure DNS at a later time.
Click 'Next' at the 'Additional Options', 'Paths', and 'Review Options' pages.
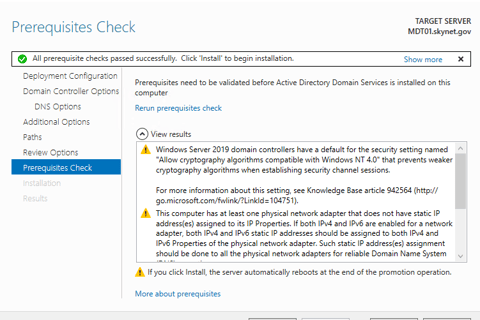
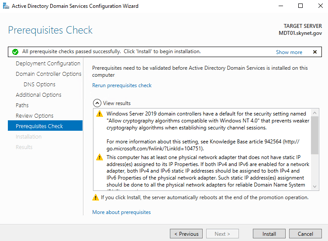
On the 'Prerequisites Check' page, ensure no errors are shown, if you have yellow warnings that is ok (such as the issue of not having a static IP address) we will address these warnings later. If you do have errors, you may need to retrace your steps or you can always email me with your issues and I can try to help you out as well. Click 'Install'.
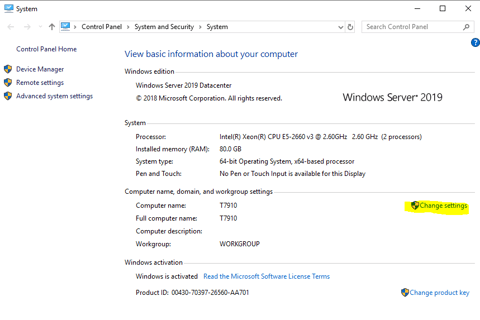
Navigate to the Control Panel->System and Security->System, click 'Change Settings' to rename the computer and join your new domain controller to the domain.
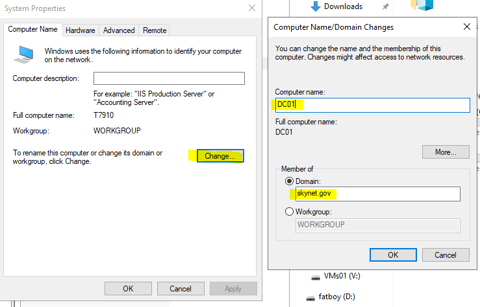
Click 'Change', change the computer name to 'DC01', change the 'Member of' option to 'Domain' and type 'skynet.gov' or the doamin name you chose, click 'Ok'.
Click 'close' and Windows will ask to reboot the computer, select yes to apply the settings and reboot.
You now have a domain controller installed and have added the computer object to the domain. Great job! Now lets add the DNS role to the server so we can manage our virtual machines using name resolution instead of just IP address resolution. DNS is an essential part of enterprise administration and can require in-depth knowledge if you are configuring authoritative and recursive DNS systems, however for lab purposes we will be using a single DNS server where the role itself is added to our existing domain controller. We will be able to manage DNS queries for all domain-joined machines.
Launch 'Server Manager' and click 'Manage' at the top right, select 'Add Roles and Features'.
Click 'Next', select 'Role-based or feature installation', click 'Next' then 'Next' again, select the 'DNS Server' checkbox, a window pops up click 'Add features'.
Click 'Next', then 'Next' again, then 'Next' again, leave the checkbox unchecked for the restart and click 'Install' to begin installing DNS Services Role on your Windows Server.
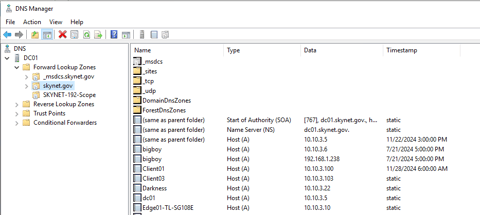
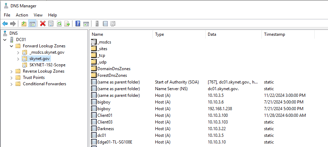
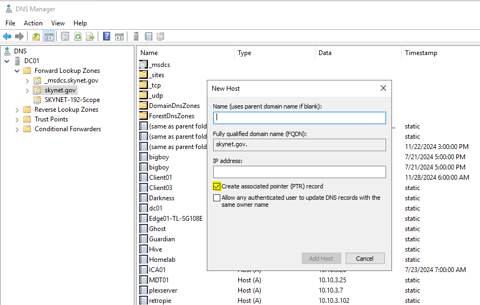
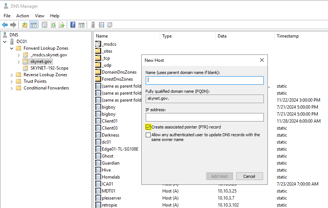
Navigate to 'Start' and search 'DNS' to launch DNS Manager. Connect to your fully qualified domain name (FQDN), in my case it is the 'skynet.gov'. Under the dropdown for 'Forward Lookup Zones', we can add new A records which maps your server names to a corresponding IP address. Click the dropdown for Forward Lookup Zones, click the dropdown for your domain, right click the open space and select 'New Host (A or AAAA)'.
It is at this point we can actually associate a computer/server name with an IP address. When you are ready to create a new A record entry, ensure the check box for 'create and associated pointer record (PTR)' is checked. This will ensure a Reverse Lookup Zone is automatically created as well which maps an IP address to a domain name (opposite of a forward lookup zone). Both the Forward and Reverse Zones should exist when we make a new DNS entry.
When we add new servers to our domain, we will statically assign an IP address and specify this DNS server to connect to; this way a DNS entry will automatically get created for us.
Name: DC01
IP Address: 10.10.2.2
See the Administer Your Home Lab page to start building servers on your home lab. Just remember you can always use DNS Manager to manually assign names to IPs, delete and recreate A records, as well as many other options we will cover in future blogs.
Download the HomeLabGuide.pdf for the complete list of servers we will create in this home lab.
NEXT: Administer Your Home Lab